前回はGoogle Cloud SDKのインストールと設定をしました。
今回はgcloudで関数のコンパイルをしていきます。
1.Deploy the function
・デスクトップ上のGoogle Cloud SDK Shellと書かれているアイコンを実行します。[画面1]
![f:id:den_noh:20180513115330j:plain f:id:den_noh:20180513115330j:plain](https://cdn-ak.f.st-hatena.com/images/fotolife/d/den_noh/20180513/20180513115330.jpg)
・実行するとこのような画面が開きます。[画面1-1]
![f:id:den_noh:20181105214421j:plain f:id:den_noh:20181105214421j:plain](https://cdn-ak.f.st-hatena.com/images/fotolife/d/den_noh/20181105/20181105214421.jpg)
・ディレクトリをmy_weatherに移動します。
(コマンド画面で “cd C:\Dialogflow\my_weather”を入力)[画面2]
![f:id:den_noh:20180513130755j:plain f:id:den_noh:20180513130755j:plain](https://cdn-ak.f.st-hatena.com/images/fotolife/d/den_noh/20180513/20180513130755.jpg)
(これはPart.3の1.自身のPC上で環境構築を行うで作成したディレクトリです。)[画面2-1]
![f:id:den_noh:20181105215038j:plain f:id:den_noh:20181105215038j:plain](https://cdn-ak.f.st-hatena.com/images/fotolife/d/den_noh/20181105/20181105215038.jpg)
・C:\Dialogflow\my_weatherに移動した後コンソールに以下を打ち込みます。[画面2-2]
gcloud beta functions deploy my_weather –stage-bucket [BUCKET_NAME] –trigger-http
(画像中のコマンド文が間違っていたので訂正しました。)
![f:id:den_noh:20181105231409j:plain f:id:den_noh:20181105231409j:plain](https://cdn-ak.f.st-hatena.com/images/fotolife/d/den_noh/20181105/20181105231409.jpg)
(ちなみに上のコンソール文でdeploy my_weatherの部分はindex.js中のexports.my_weather = function my_weather (request, response) と一致させる必要があります。{[画面2-3])
![f:id:den_noh:20181105234618j:plain f:id:den_noh:20181105234618j:plain](https://cdn-ak.f.st-hatena.com/images/fotolife/d/den_noh/20181105/20181105234618.jpg)
これはPart.3の1.自身のPC上で環境構築を行うで作成したindex.jsの中身です。[画面2-4]
![f:id:den_noh:20181105235136j:plain f:id:den_noh:20181105235136j:plain](https://cdn-ak.f.st-hatena.com/images/fotolife/d/den_noh/20181105/20181105235136.jpg)
・[BUCKET_NAME]の部分には次のものを記入
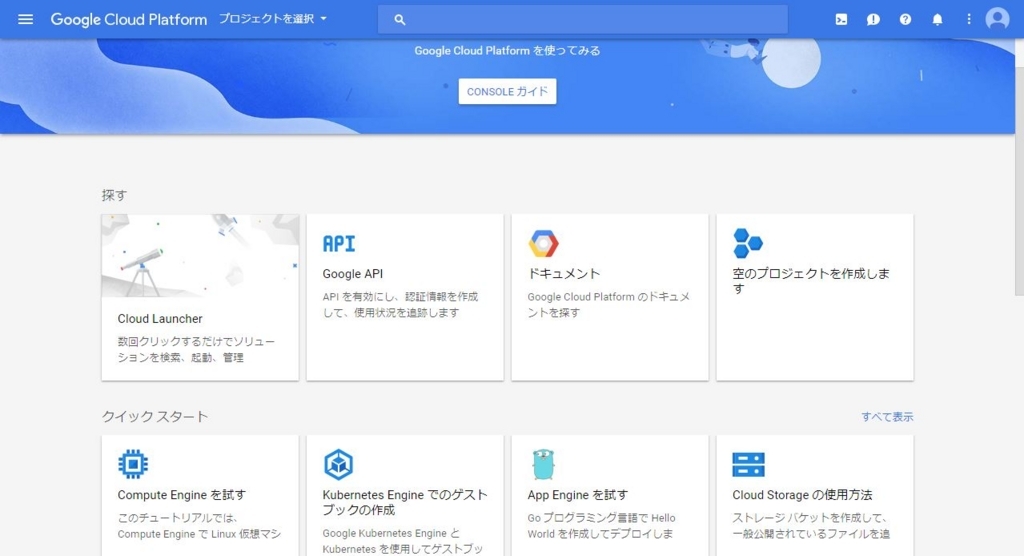
・以下のリンクをクリック
Google Cloud Platform
・移動先のページでリソースのCloud Strageをクリック[画面3]
![f:id:den_noh:20180514000028j:plain f:id:den_noh:20180514000028j:plain](https://cdn-ak.f.st-hatena.com/images/fotolife/d/den_noh/20180514/20180514000028.jpg)
・移動先のmy-weather***.comの文字列を[BUCKET_NAME]の部分に記入します[画面4]
![f:id:den_noh:20181106000109j:plain f:id:den_noh:20181106000109j:plain](https://cdn-ak.f.st-hatena.com/images/fotolife/d/den_noh/20181106/20181106000109.jpg)
・記入した後Enter[画面5]
![f:id:den_noh:20180514002258j:plain f:id:den_noh:20180514002258j:plain](https://cdn-ak.f.st-hatena.com/images/fotolife/d/den_noh/20180514/20180514002258.jpg)
・成功すると以下のような画面が表示されます。[画面6]
![f:id:den_noh:20180514002820j:plain f:id:den_noh:20180514002820j:plain](https://cdn-ak.f.st-hatena.com/images/fotolife/d/den_noh/20180514/20180514002820.jpg)
・urlの部分はこのあと使うことになります。
2.DialogflowでWebhookを有効にする
・Dialogflowのページを開き、左側のバーからFulfillmentを選択します。[画面7]
・Fulfillmentのページに移動したら、Webhook を有効にします。[画面8]
・Webhookを有効にするとURLを入力する欄が現れるので、先ほどの1.Deploy the functionで取得したURLをここに入力します。[画面9]
・SAVEボタンを押下します[画面10]
![f:id:den_noh:20180514235524j:plain f:id:den_noh:20180514235524j:plain](https://cdn-ak.f.st-hatena.com/images/fotolife/d/den_noh/20180514/20180514235524.jpg)
![f:id:den_noh:20180515000135j:plain f:id:den_noh:20180515000135j:plain](https://cdn-ak.f.st-hatena.com/images/fotolife/d/den_noh/20180515/20180515000135.jpg)
![f:id:den_noh:20180515001623j:plain f:id:den_noh:20180515001623j:plain](https://cdn-ak.f.st-hatena.com/images/fotolife/d/den_noh/20180515/20180515001623.jpg)
![f:id:den_noh:20180515001444j:plain f:id:den_noh:20180515001444j:plain](https://cdn-ak.f.st-hatena.com/images/fotolife/d/den_noh/20180515/20180515001444.jpg)
3.IntentのページでFulfillmentを有効にする
・左側のバーからIntentのページへ移動し、weatherを選択します。
・ページのしたの方にあるFulfillmentを展開し、ENABLE FULFILLMENTを押下します。[画面11]
・Enable webhook call for this intentを押下し有効にします[画面12]
・最後にSAVEボタンを押下します[画面13]
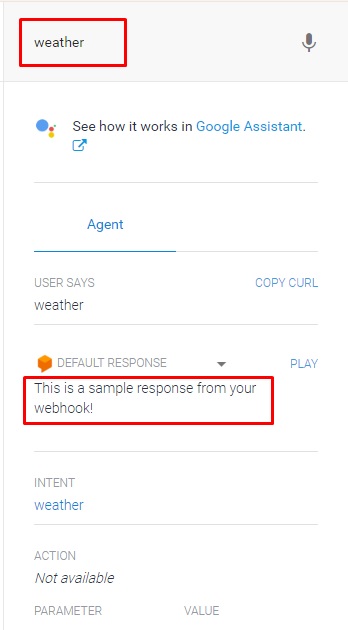
![f:id:den_noh:20180515003350j:plain f:id:den_noh:20180515003350j:plain](https://cdn-ak.f.st-hatena.com/images/fotolife/d/den_noh/20180515/20180515003350.jpg)
![f:id:den_noh:20180515003904j:plain f:id:den_noh:20180515003904j:plain](https://cdn-ak.f.st-hatena.com/images/fotolife/d/den_noh/20180515/20180515003904.jpg)
![f:id:den_noh:20180515004644j:plain f:id:den_noh:20180515004644j:plain](https://cdn-ak.f.st-hatena.com/images/fotolife/d/den_noh/20180515/20180515004644.jpg)
4.Tryしてみる
・右側のバーにあるTry it outに「weather」を入力しEnter
・DEFAULT RESPONSEの部分に「This is a sample response from your webhook!」と表示されるのを確認します。[画面14]
![f:id:den_noh:20180516000939j:plain f:id:den_noh:20180516000939j:plain](https://cdn-ak.f.st-hatena.com/images/fotolife/d/den_noh/20180516/20180516000939.jpg)
次回で最後です。
コメント